Showing posts with label finish. Show all posts

Tuesday, May 1, 2018

A Finish: Four Patch Woolies

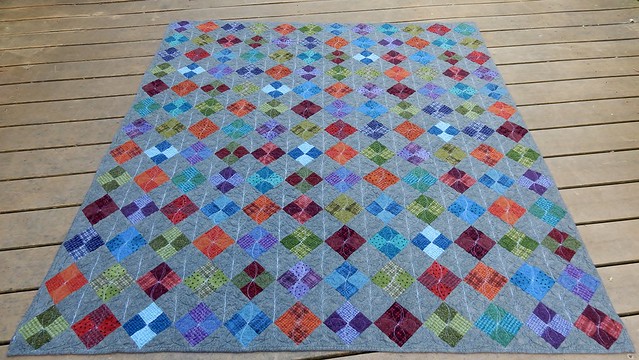
Four Patch Woolies
I was attracted to this quilt a year or so ago when Keepsake Quilting was having a 50% off sale on kits.  This is one of three four patch patterns by Bonnie Sullivan in a booklet called All Through The Night.  I could have easily purchased a jelly roll and background fabric for less, but whatever.  Sometimes I don't think things through all the way, but at least it was on sale.

Four Patch Woolies
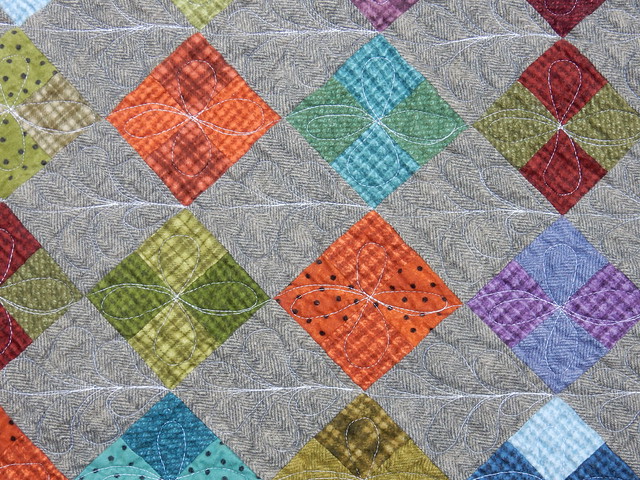
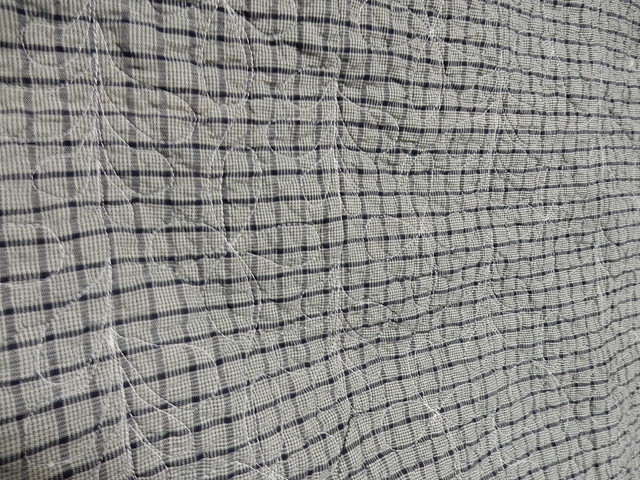
The Flannel fabrics are from the Woolies line, printed to look like suiting, houndstooth, and checked wool fabrics.  For the backing fabric, I chose not to do flannel. As much as I love flannel, it does make a quilt heavy.  I found a great homespun on sale that I think works well with the Woolies.

Four Patch Woolies

I'm thinking if I had put the quilt on our grass for a picture, the colors may represent better, but I'm not a professional photographer so this will do :)  This quilt will be used as a throw in the trailer, hopefully we'll be able to go camping in it soon!

Sunday, August 7, 2016

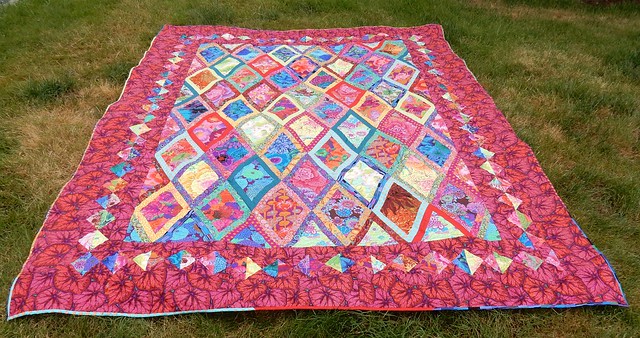
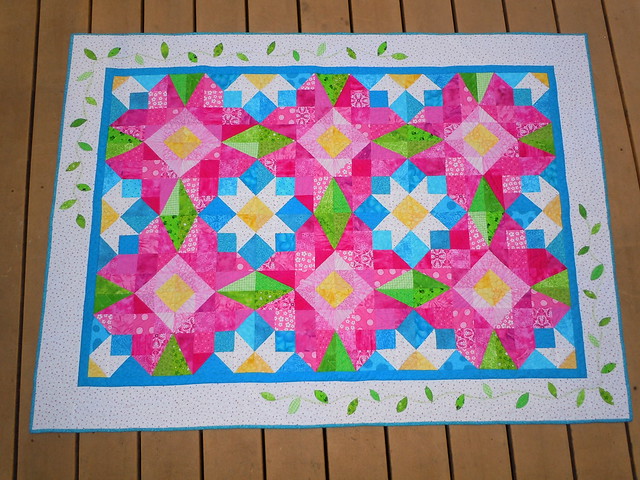
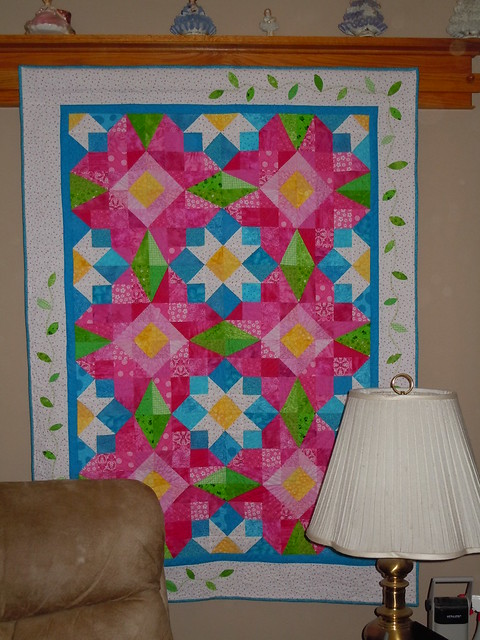
Bordered Diamonds Plus! Finished

Plus, because of the addition of the flying geese... creative right? :)  I know, lame. LOL!  I started Bordered Diamonds in 2015 at a quilt retreat.  It was a fairly quick quilt top to finish, but I wanted to add more to it to make it larger.  It took another quilt retreat to get through the millions of flying geese I made, and now finally it's a finish.
Bordered Diamonds Plus!

Last night while watching Miracles From Heaven (*note below for a comment on this), I took the last stitch of the binding.  Even though this quilt is larger, the binding went a lot faster for me than the Field Day binding did.  I think I like multiple fabric bindings for that reason.  It changes things up and keeps it interesting.

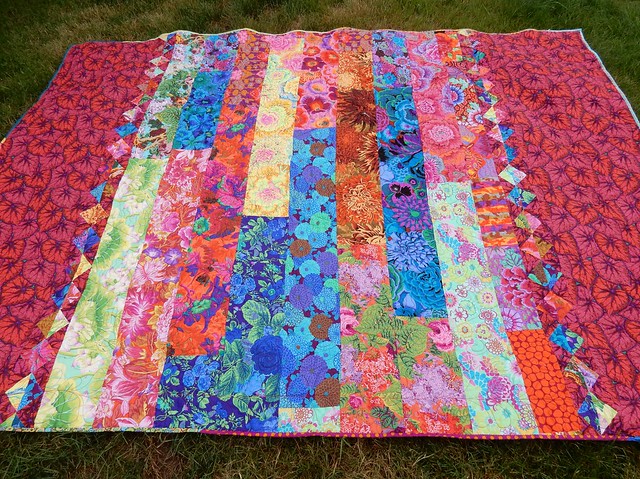
Bordered Diamonds Plus!

  I used up all the pieces I could from the fabric collection for this quilt.  I know I could have saved large pieces and used them in other quilts, but the fact is... I have a lot of those large pieces I've saved from other projects that just linger in my stash.  Instead of using backing fabric that I had recently bought on sale for this, I decided that using up the fabric was more appropriate and would fit better.  I had (and still do) so many flying geese leftover, that incorporating that into the back was obvious.  Splitting up that last piece of pink Begonia fabric to use for the backing needed to be done.  I have searched twice now for more yardage of that fabric for this quilt, so that final 2+ yards left of it was going to get used up in this quilt.  It's an older fabric that takes some sleuthing to find.

Blowing up the backing photo you can kind of see that I practiced more feathers in the border.  I did some back and forth wiggles in the diamonds, and stitched along the outside of the diamonds.  I did a wavy pattern on the pink Begonia fabric between the center and the flying geese as well.  Because the fabrics are so busy, and all over pattern would have been just fine.  You can't really see any of the quilting.

Now I can get back to my Clara's Stars for night time stitching.

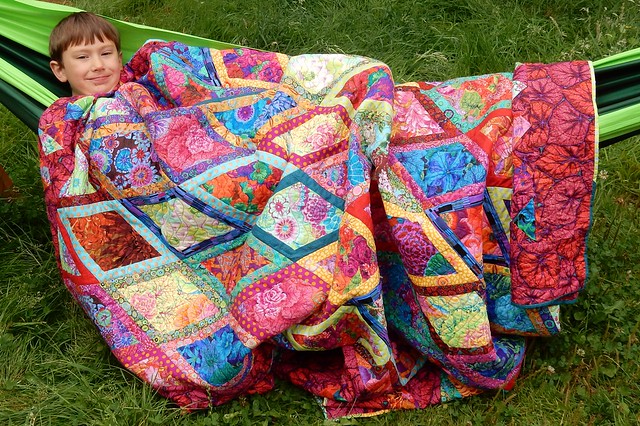
Bordered Diamonds Plus!

*Miracles From Heaven.  This was a great movie.  I hadn't realized that it was based on a true story until the end.  What I found most interesting was that my 9yo who typically doesn't sit and watch movies with me, chose to sit and watch this movie with me!  It must have struck him so much that this morning I came downstairs to find him watching it again (I rented it from Amazon).  This is what I meant about him being a thinker which I noted in a previous blog post. I don't know if the two are related (the movie subject and the death of his birthmother) or if it was just an interesting movie to him.  But to watch it a second time, to me, was really something.  He could have chosen to watch cartoons, or spongebob, or whatever!  Instead it was this movie.

Anyway... Have a great day.  I need to see if there may be another quilt top I can finish up to keep this roll going :)

Wednesday, August 3, 2016

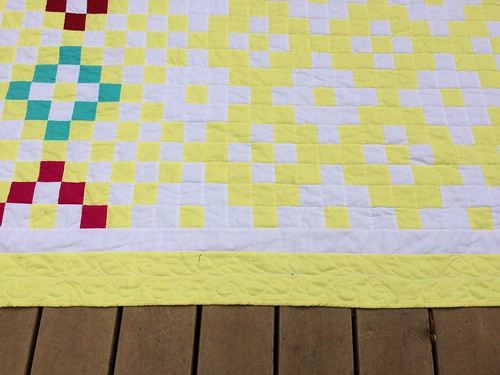
Field Day: Finished!

After 9 days of working on the binding (and a lot of distraction!), I finally took the last stitch in Field Day last night... now I am on to Bordered Diamonds.  Hopefully by the end of the week I can call that one a finish as well.

A few pictures (with it being overcast outside, it is even more bright of a quilt!):
Field Day
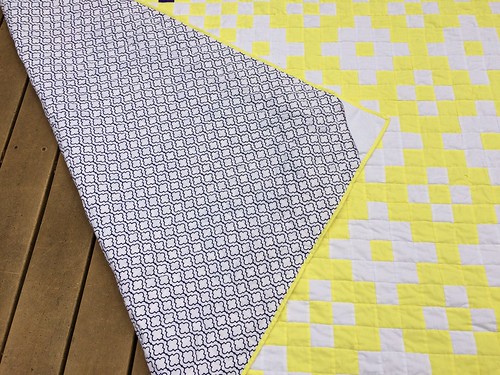
I did not go fancy on the quilting, I already planned to follow the seams in a grid pattern.  Adding the two extra borders, I needed something else so I decided to practice feathers in the yellow.  I know so many are so good at that, but I need to keep practicing on them.
Field Day

Hancock of Paducah had a great sale on quilt backing....
Field Day

It's popped into the wash, and it may go on the bed tonight as it feels like fall is already here!  We don't even have our upstairs fan on at night.  This is August, right?  Though this is probably more typical weather for the northwest, last year was a scorcher.

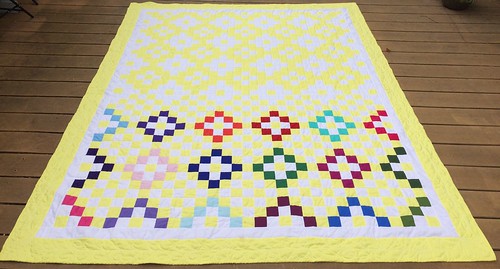
I'm thinking about making another quilt from the Kona Color Of The Year patterns. There is a yellow/white star quilt (Lemon Stars by Darlene Zimmerman) that I liked also.   With Field Day in mind, I may put in another color than just white and yellow.

Sunday, August 2, 2015

A Finish and Retreat Time!

I just got back from a quilt retreat and I had such a great time!  I love quilt retreats but they don't happen very often because of logistics with the kids.  But I have been able to sneak in at least one a year for the last few years now (actually, thinking about it... two a year!).

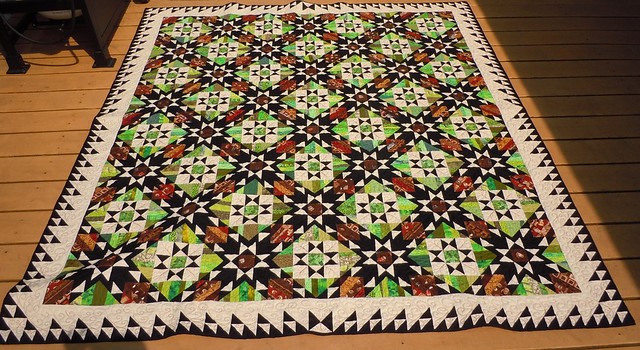
First, I finished Orca Bay!  I am so excited!  I had a goal to get it done so I could enter it into the fair this year, so for the last two weeks I have been working on my Juki after doodling some designs on my post-it notes (I like to have post-it notes around the house for all sorts of things, including if a design pops into my head or I see inspiration for a quilt).
Orca Bay aka "Kaffee Klatsch at Orca Bay"

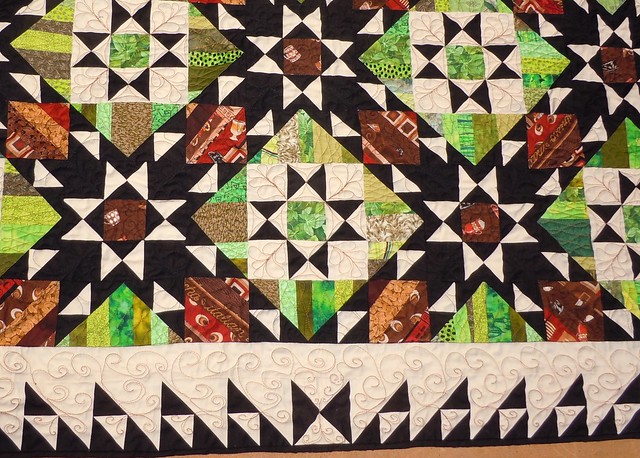
A closer-up pic of the border and blocks:
Orca Bay aka "Kaffee Klatsch at Orca Bay"
The border inspiration are waves and whales spouting out water.

I was so surprised when I got to the retreat, my friend Julie had a gift for me and it was her contribution to Quiltmaker's Scrap Squad!  Dogwoods in Bloom by my friend Julie Huffman

Dogwoods in Bloom by my friend Julie Huffman
To say I was so excited for this quilty gift is an understatement!  It even had a sleeve already on it, and now it is hanging up in my living room :)  I absolutely love it!!


And now the boys are trying out making ice cream.  I, on the hand, bought some Talenti gelato to try out instead (because some friends at the retreat were talking about how good it is).  I don't know if I'll share or not :)
Ice Cream


I have two other projects that I finished the blocks on at this retreat too.  I started them at the retreat I went to in June, so it feels great to have those ready to be placed into a top.  One will be a gift, so I am going to wait to post about it, and maybe I will make up another blog post about the other.  Most of all, I am so happy to have my Orca Bay finished.  I absolutely love that quilt so much... I called it "Coffee Time at Orca Bay" since I used coffee fabrics for the browns, but today I was thinking that I should have named it "Kaffee Klastch at Orca Bay" since I started the quilt project at one retreat and finished it at another... there is a lot of talking and visiting at retreat, they are special times for sure.

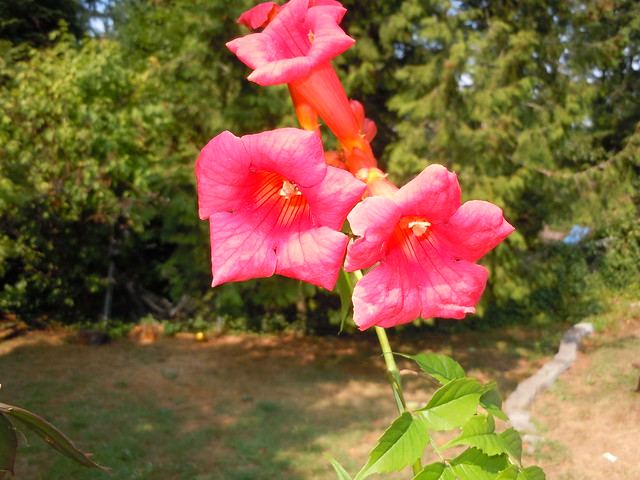
And last but not least, my vine is finally blooming.  I have to search to find out what kind it is again, but I have been waiting two years for a bloom!  This was the year finally!
Blooming Vine
edit: It is some sort of hybrid of the trumpet vine campsis radicans, but it dies back in the winter so not so invasive as it would be in the south.  Also, I have one that is grafted to a stalk and the other is more of a creeping vine.  This one is from the creeping vine, but the other is starting to finally put on blooms too.
Happy August everyone!

Tuesday, May 19, 2015

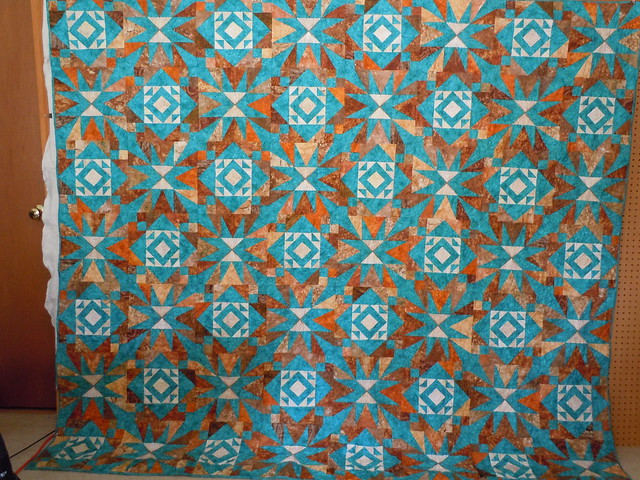
Desert Stars, Finished!

It seems more nordic to me than desert, mainly in design. The colors that were preferred were teal and browns (as in desert tones) and the Stonehenge line did fill that need.  Kind of nice to have the quilt turn out nearly exactly like my EQ6 plan.

Desert Stars

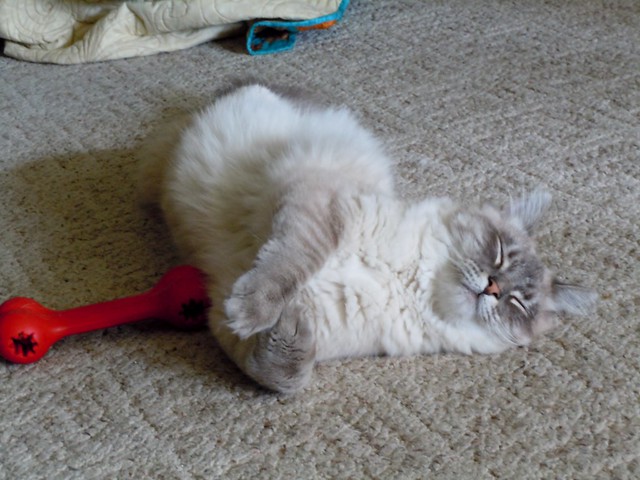
I first attempted to take a picture on the living room floor, but this guy saw what I was doing and decided he needed to inspect the quilt. Such a stinker.
Loki

Now I am going to have to see if I can fit the quilt in someone's carry-on for our trip on Friday.  I really didn't think I would be finished with the binding before Thursday, but little by little it got done with a little help from Amazon Prime and watching the first two seasons of Vikings... I got hooked this year during season 3.  I've decided that I don't think we've ever stopped living in barbaric times (considering current events).  I think about my ancestors living in the rain, cold, and constant struggles and have to say that I much prefer today's time.  Sure, I live in the PNW, but it isn't on a rocky fjord.  Plus I really like having hot water at the ready :)

I think I need to quilt up my Orca Bay now.  I think that will be my fair entry for this year.

Tuesday, August 12, 2014

Old Post: Dec 28, 2012... a Finished Jane Top!

***Note, this is from my first blog which got overtaken by a spam virus, and I ended up shutting it down. While reading through Feedly (where I read my blogs), I discovered when clicking on my old blog (I never unsubscribed my old blog) I could pull up old posts.  I am thrilled because now I can place certain posts here and save them.  I will have this note on top of any post that is from my old blog****
_______________________________________
**update 8/2014: Here is a link to my finished Jane Quilt.  After encouragement from friends, I decided to go ahead and enter Jane into The Evergreen State Fair in Monroe (runs Aug 21-Sep 1).  Hopefully she at least wins a 6th place ribbon :)  I entered it as an intermediate, but I am nervous about that as this quilt includes 14yrs of skill building, meaning perfect points may not have always happened.  On top of that, this is the first time I have ever entered anything in for judging (aside from when I did 4H rabbits as a kid).  I have had quilts sent to the Houston show for special exhibit, but that wasn't judged... I think I just have something against being judged :)  When we go to the fair in a couple of weeks, I will post a fair picture of Jane.
________________________________________
Today I finished up one triangle:
bottom 13: Argyle
The embroidery on the final corner:
corner 4
(I should really photoshop that piece of linty fabric off the block! of course I didn’t notice it until I uploaded pics).
And I sewed the final border on for this:
A finished quilt top!
yah!!
Right now it is getting ready to be pin basted. The backing, batting, and top are altogether, I just wanted to take a break for a few minutes. Pretty productive afternoon. Plus this morning I finished up my Easy Street clue 7, so I’m just waiting for Monday for the next one. I’m glad we won’t have to wait until next Friday for that.
The quilt top measures about 82″ square. I am using Kona white and some scraps for the backing, along with a color swatch guide that I made about halfway through this project:
Dear Jane fabric placement
I’m not sure how I will quilt this one yet. I plan to quilt in the sashings and then go back through the blocks with various designs. I thought about adding a white border and quilt a feather pattern through that, but this top is finished and this will most likely be the last update for a while (at least until the quilt is finished).
________________________________________________
ETA 12/30/12: later that night… the math seemed off, and I was right. I was off by 1000. Because that error was too big for me to just let go, I made a new block. Since I marked my block with a thin pigma pen, I couldn’t simply remove the embroidery and fix my error…. so, I tested removing pigma pen marking on another piece of fabric and was not successful. Tonight I finished applique and embroidery on my new corner and I am very pleased. I have some tails that I need to clip from the perle cotton (a variegated Valdani) since it is showing through, but at this point I am now ready to QUILT THIS BABY!
Bottom Corner: redone

Sunday, August 10, 2014

kaleido-Finish!

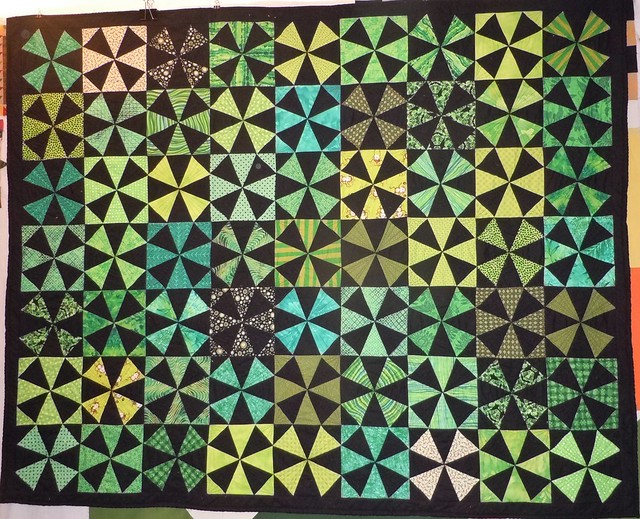
Now that I am able to finally spell kaleidoscope without having to lean on spell check, I am happy to report a finish!

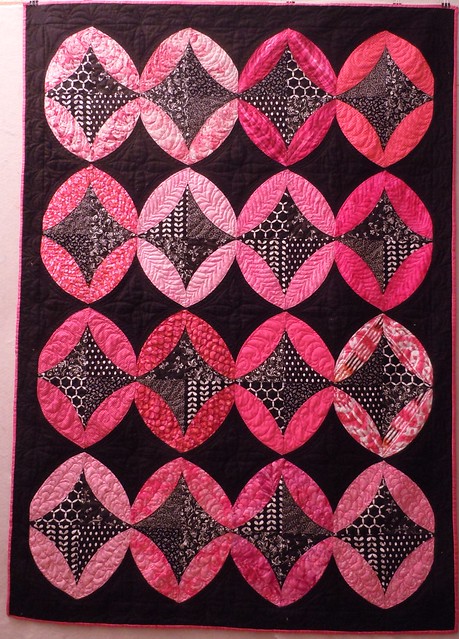
Approx 72x56"
Kaleidoscope Finish!

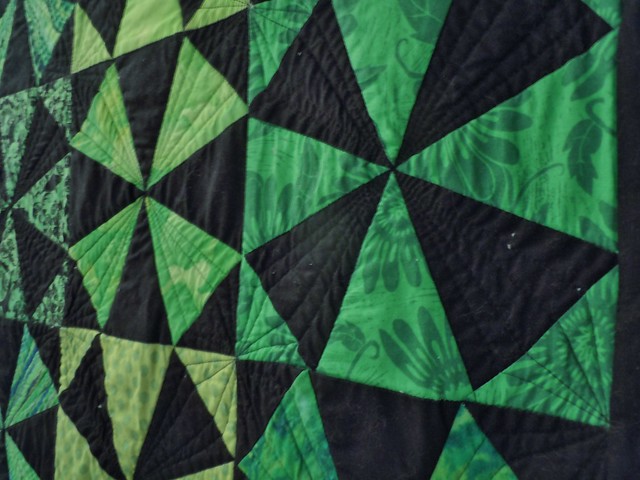
I had more plans with quilting in the other triangles--freemotion all the way through the rows, but I decided that it had enough quilting in it, and it would be great the way it is.  Because of all the turns going on with the straight line stitching (I am not ready to master holding a ruler with my Juki and freemotion the lines), each of the 9 rows took me approximately 90mins to finish.  I started this quilt in May, but the top sewed up in no time.  It was the quilting which took me the most amount of time.
Kaleidoscope Finish!


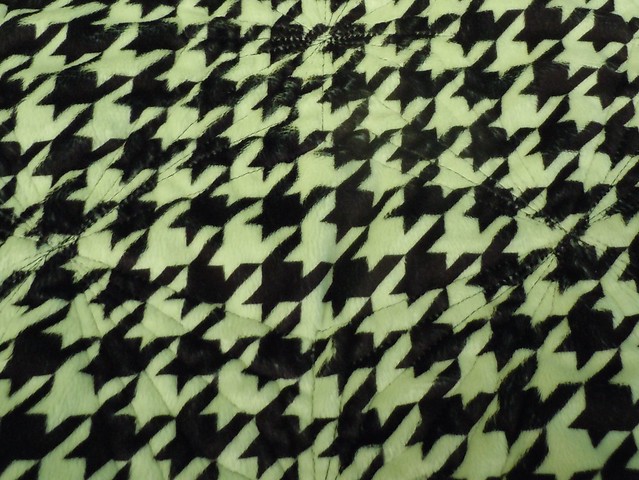
A low-nap Minkee fabric was used.  I would have liked it a little thicker, but this is soft regardless.  it's hard to tell in the photo, but it is a green and black houndstooth.  The green did not pick up very well and looks very light here.
Kaleidoscope Finish!

This quilt is headed down to Vegas for a special little boy this week!  I am also boxing up some goodies to go with it that would work well for snacks during a movie time :)  I think I am almost ready to sew up another kaleidoscope quilt, it was fun to do.

Saturday, August 2, 2014

Row By Row Experience, in the books

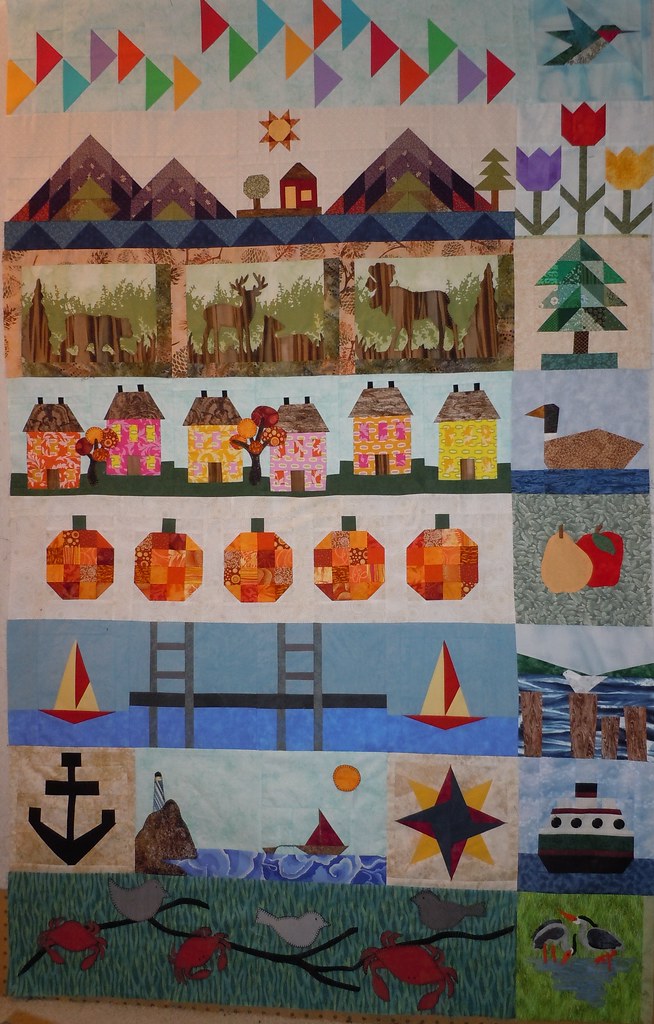
The Final Layout:
Row By Row Experience

I went through my Washington State Internet Quilters block swap blocks and decided to add eight to the sides to give it more width.  I think it turned out nice.  Here are the rows and the people who made the swap blocks:

"Famous Last Words" (AKA, I am not doing this project, Mary!) By Melissa Devin
1. Attic Window, Wenatchee. Hummingbird  by Donna Kay Mowery
2. Leavenworth Quilt Company. Tulips by Lou Ann Hughes
3. Sew E-Z Too, Spokane. Tree by Joyce Callison
4. Quilted Strait, Port Gamble.  Goose by Dru Rowan
5. Keepsake Cottage, Bothell. Fruit by Joy Neal
6. Calico Threads, Tacoma. SeaGull and pilings by Julie Huffman
7. Creative Union Fabrics, Port Townsend. Ferry by Julie Scholes
8. Karen's Quilt Shop, Sequim. Herons by Naomi Vargas Peck

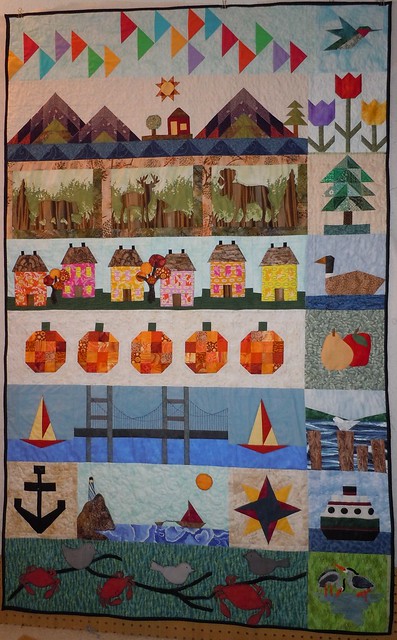
All quilted and bound.  It is currently in the wash, hope nothing disintegrates before I can take it to the shop tomorrow!
Row By Row Experience

I just about totally changed the 7th row, Creative Union.  I changed the compass to make it paper pieceable, and I also paper pieced the sailboat, changed the rock a bit, and left the rope off the anchor.  Oh, and I didn't reverse anything, so the master row is going in the other direction.  Oh well.

I quilted the cable lines on the Tacoma Narrows Bridge.  I thought about embroidering, but went with this instead.  It turned out well I think.

I think that's it on my report for the putting together of the rows.  Now I am just hoping I will be the first one done at the shop tomorrow!  We are taking Daniel to camp first, but I don't think they open until 11 or 12, so I may be ok :)

Sunday, June 15, 2014

A Father's Day Quilt

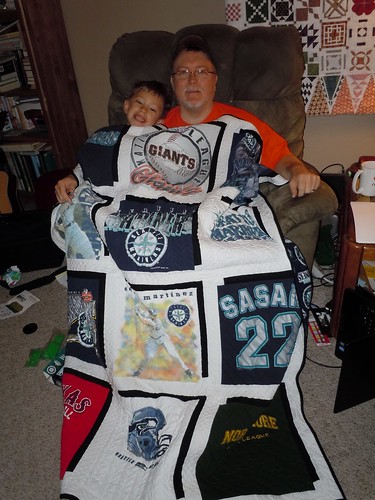
A few months ago, Kevin and I did a major cleanout and donation run with all the clothing neither of us wear anymore.  Kevin literally has hundreds of t-shirts... many freebie's from work or trade shows he attended.  Some were actually purchased.  From the ones that he culled, I pulled aside the Mariners or sports-related tee's that he was ready to get rid of to make into a quilt.  I have made one other t-shirt quilt using my college sweatshirts, t-shirts, my high school grad t-shirt, and when I needed some more material I printed off my diploma and my picture from graduation.

College quilt, not a great presentation but it's from the "archives":
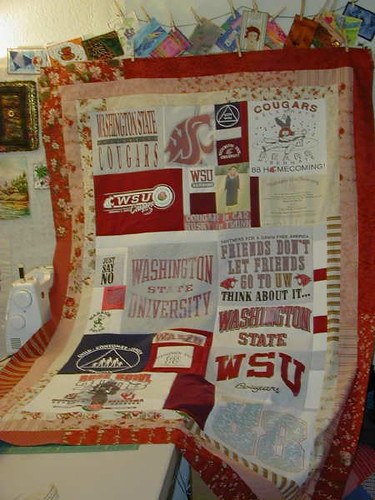
Sweatshirt/t-shirt quilt revisted

That was a learning experience.  I used pieces of material as filler, and then framed it with some Robyn Pandolph fabrics that worked with the crimson.  Finished in 2006.  I used a fleece backing (a Washington State University fabric) and it has a batting.  Along with the sweatshirt material, this is a heavy quilt.  AND the preferred quilt by all the guys in the house.

So with that learning experience under my belt, I went for a more planned version for Kevin's Father's Day quilt:
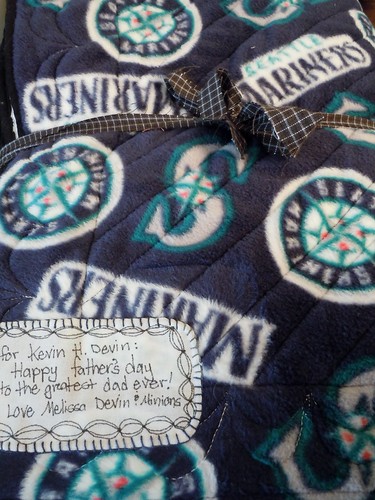
Father's Day T-shirt quilt

Though most of the shirts were from the Mariners (we had season tickets for a couple of years, so there is a freebie or two along with purchases), I included a shirt from our honeymoon in 1996 (we went to a Giants game, they lost), a shirt from when he was a coach for Daniel's little league team, and then the Texas shirt? I am not sure where that came from, but we'll say that represents Daniel's birth state :)
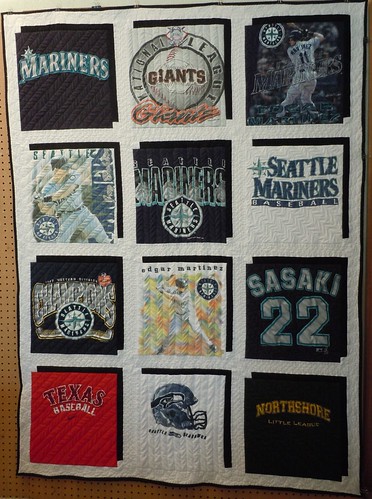
Father's Day T-shirt quilt

I'm not really sure how the shadow effect worked, I'm wondering if I should have used half square triangles in the corner where the white squares are, or maybe framed the blocks first.  The best looking one, imo, is the red with the shadow.  The white shirts don't look as good.
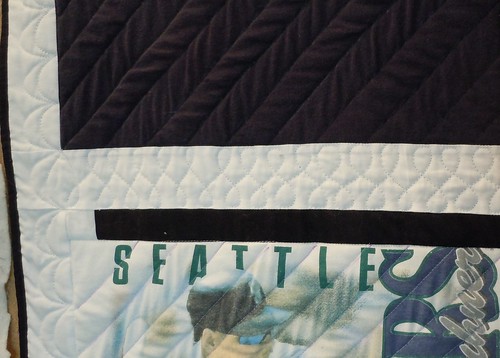
Father's Day T-shirt quilt

The quilt ended up being literally a "(almost) quilt in a day" quilt.  I worked on it for the day when Kevin and the boys were at cub scout family camp (yeah, I am feeling guilty about not going, but boarding the dog was not something I wanted to do.  I need to see if any neighbor's might want to check in on him next time).  My binding got a bit stretched when I was sewing it on, so it has a slight wave to it.  I am attributing that to the fleece mainly, that takes some getting used to.  At least with the t-shirt material, it had a stabilizer ironed down so the stretch and curl did not happen.

Two issues I had:
1) rubbery screen printed shirts are hard to quilt with, using a foot that isn't metal may help with the "glide" factor.
2) I used a very lightweight interfacing that I also used in my first quilt--well, I think it was a bit too lightweight compared to the other lightweight interfacing I just bought.  The shirts that had the newer interfacing quilted much better and they hardly stretched at all during the quilting process.

And our happy customer:
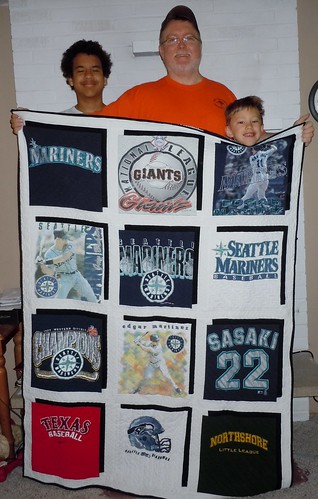
Super Secret Father's Day Quilt

Super Secret Father's Day Quilt

Sunday, April 27, 2014

Finished Quilt: Mod Olives for Alora

I am happy to be able to finally publicly post about my latest finish, a baby quilt!  And I am more excited that April 28th will be my granddaughter, Alora May Devin's birthday!  Tomorrow!!  Kevin is delivering the quilt today.  They live in Nevada and as luck has it, Kevin was already traveling on business for this week--I wish I could have swung bringing me and the boys down too, but we'll come down soon.

I admit that when I first read about the Quilt A Long for Mod Olives, I wasn't too excited about it and hadn't planned to make it.  However, that changed when I saw the quilting that Jenny did--it was gorgeous and I believe the quilting REALLY made this pattern great.  Not the greatest photo, but here goes:

Mod Olives: Finished Baby Quilt

A few detail pics.  I really enjoyed quilting this one:
Mod Olives: Detail

Mod Olives: Detail

Mod Olives: Detail

The backing is a pink flannel chevron print.  Soft and cozy.

The quilt above was made using a second set of blocks.  I wasn't happy with how I wasn't able to square them up very well, so I decided to try again and added a half inch to the cutting directions for the black and black/white prints.  That was all it took to get them pretty close to perfect.

Because I had my first set of blocks still, I decided to put those into an alternate pattern.  Excuse the iPhone picture:
Mod Olives: Alternate layout, quilt 2

I think I like the layout on the alternate quilt top above the best, but the reason I decided to go with the circular (olive) layout for the baby quilt was because I already had the quilting design in my mind.  I am not sure how this second one will go, but I really like the design  I found that this layout was great and the imperfections aren't glaring at me.

And this breaks a blogging hiatus!  I wish I could also report a UFO finish, but I keep adding new projects to do for 2014 instead.

Friday, January 31, 2014

A January Finish

Today I finished up something from my UFO list, too bad I didn't finish up more this month but this is one less item in my UFO bin!  Woohoo!  The colors are not totally true in the image, but I think the picture I have of it in the previous post as a top is much closer.  This wallquilt measures about 30" square.

Bluework Teacups

The back:
I like to show backs just because you can see the quilting better.  No fun, scrappy pieced back for this one. I used a piece of Kona muslin that was in a scrap pile along with a perfect sized scrap of batting.
Bluework Teacups


And my youngest sweetie.  For those wondering (since it is "Blue Friday"), he does have a Seahawks shirt on under his OSU sweatshirt.  I know, it's orange like the Broncos, but it is most definitely NOT Broncos fanwear.  Go Seahawks!! :)

Bluework Teacups

#47 on my UFO list is officially finished.

Friday, January 24, 2014

Quilt UFO: "Bluework" Teacups

I came to the realization that I am close to the end of January and I haven't finished a UFO yet.  After sewing a step on the pinwheels for the tulip top, I pulled out a quick-finish top from a container: #47 Tea cup bluework iron on top with Mary Engelbrieght fabrics wallhanging.

"Bluework" Teacups

It's cute, and it was quick to make up.  I'm not sure why I put it aside and it has been unfinished all these years, but it is currently basted and ready for quilting.  My plan is to finish it up this weekend.  I used to have a great spot in the kitchen to hang these types of quilts, but we added a second china cabinet and I lost my quilt wall.  Perhaps that's why this has been unfinished.